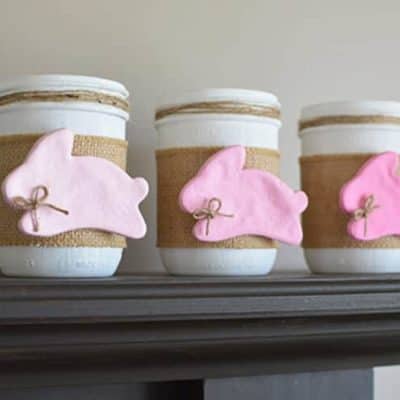
DIY Bunny and Mason Jar Spring Decor
Do you decorate for spring? I usually don't but I do love to change up my decorations often. This DIY Bunny and Mason Jar Spring decor idea can be easily customized for whatever holiday or event you want to use it for! #masonjar #diy #craft
Equipment
Ingredients
For the Bunnies
- 1 cup flour plus additional for rolling
- 1/2 cup salt
- 1/2 cup water
- Bunny or rabbit cookie cutter
- White acrylic paint
- Pink acrylic paint
Jars
- 3 mason jars, 16 oz wide mouthchalk painthot glue2.5" wide burlap ribbontwine or jute rope
- 3 mason jars 16 oz wide mouth
- Chalk paint
- Hot glue
- 2.5" wide burlap ribbon
- twine or jute rope
Instructions
Bunnies
- Make a salt dough by mixing together flour, salt, and water in a bowl until a ball forms. Remove dough from bowl and knead on a floured surface, adding a little more flour as you go until the dough is no longer sticky about 3-5 minutes.
- Roll dough to 1/4" thickness on to a lightly floured surface and use a cookie cutter to cut bunny shapes.
- Place shapes onto a foil-lined baking sheet.
- To dry the bunny, bake it in an oven at 325 degrees for about 30 minutes. Be sure to check the bunnies after 15 minutes. Sometimes the dough will bubble up, if that happens, put on an oven mitt and flatten the dough. The salt dough will begin to brown slightly when dry. Remove from oven and cool completely.
- You can also air-dry your salt dough. This can take 2-3 days and after the first day, I like to flip my bunnies over on the foil to ensure even drying.
- When bunnies are dry, paint them! I started with a very light pink, by using a dollop of white paint and a tint of pink mixed with it. I then add more pink to the same paint and mix well and paint another bunny. And finally, for the darkest bunny, I add more pink to the paint, mix, and paint. Let dry completely.
Jars
- Wash and dry jars. Use white chalk paint to paint the jars. Let dry completely. I just did one coat as I wanted more of an irregular look.
- Trim 3 pieces of burlap ribbon to fit around the jar. Affix to the jar with hot glue in the back, where the two ends meet/overlap.
- Tie twine around the top of the jar and double knot it in the back so it's not visible. I wrapped the twine around my jar 3 times.
- Use hot-glue to affix the bunny to the burlap on the jar. Tie a teeny bow and attach with a dollop of hot glue to the bunny's neck. Repeat until you have all 3 jars done.
Tried this DIY?Let us know how it was!